Welcome, fashion enthusiasts! In this DIY fashion journey, we’re about to embark on a creative adventure to revitalize your wardrobe without breaking the bank. Say goodbye to mundane outfits and hello to unique, personalized style.
DIY Fashion Projects:
Whether you’re a seasoned DIYer or a novice crafter, these step-by-step tutorials will guide you through customizing old clothes, creating accessories, and upcycling thrift store finds. Let’s dive in!
Customized Denim Jacket: Step-by-Step Guide
Materials Needed:
- Old denim jacket
- Fabric paint in desired colors
- Stencils (optional)
- Painter’s tape
- Paintbrushes or sponge brushes
- Palette or disposable plate for paint
Step 1: Gather Your Supplies: Begin by selecting an old denim jacket from your wardrobe. The more worn, the better, as it adds character to your customized creation. Collect fabric paint in your preferred colors, stencils for intricate designs (if desired), painter’s tape, and paintbrushes or sponge brushes. Lay out all your materials on a clean and spacious workspace.
Step 2: Choose a Design or Pattern: Before diving into the customization process, decide on the design or pattern you want for your denim jacket. This could be anything from geometric shapes and abstract art to nature-inspired motifs. Consider your personal style and the overall look you want to achieve. You can sketch your design on paper beforehand for a clearer vision.
Step 3: Use Painter’s Tape to Create Clean Lines: Once you’ve settled on a design, use painter’s tape to outline the areas where you want clean lines or sections. This step is crucial for achieving a polished and professional finish. Whether it’s creating stripes, a bold graphic, or sections for different colors, the tape acts as a barrier to keep the paint within the designated areas.
Step 4: Apply Fabric Paint within Taped-Off Areas: With the painter’s tape in place, it’s time to apply the fabric paint. Dip your paintbrush or sponge brush into the chosen color and carefully fill in the taped-off sections. If you’re using multiple colors, let each section dry before moving on to the next. This ensures that the colors won’t bleed into each other, maintaining the integrity of your design.
Step 5: Remove Tape and Stencils Once Dry: Exercise patience and allow the fabric paint to dry completely before moving on to this step. Once the paint is dry to the touch, gently peel off the painter’s tape and remove any stencils used. Take your time during this process to avoid smudging or smearing the paint. Revel in the satisfaction of revealing the crisp lines and vibrant colors of your customized design.
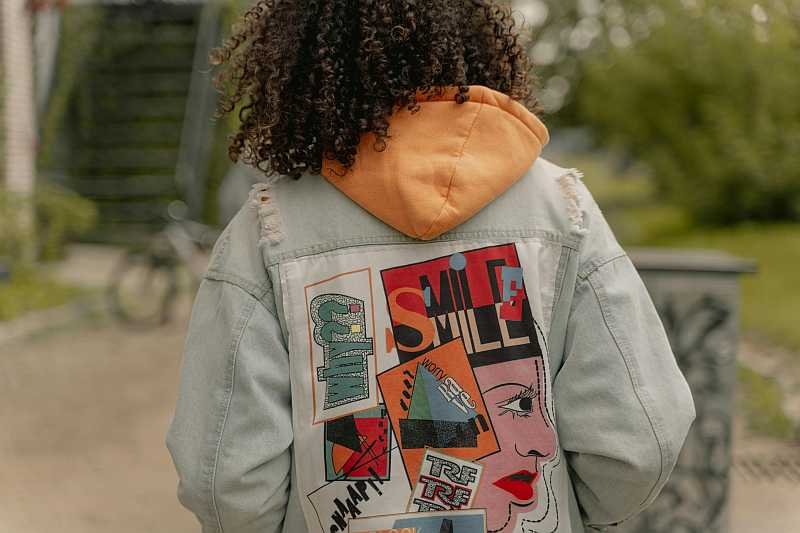
Step 6: Rock Your Unique, Customized Denim Jacket with Pride! Your customized denim jacket is now ready to make a statement! Put on your creation and showcase your unique style to the world. Whether you’ve transformed an old favorite or given new life to a thrift store find, your personalized denim jacket is a reflection of your creativity and individuality. Embrace the compliments and enjoy flaunting your one-of-a-kind fashion piece with pride!
Upcycled T-shirt Tote Bag: Transforming Discarded Fashion into Functional Art
Do you have an oversized graphic T-shirt lurking in the back of your closet, neglected and forgotten? Don’t toss it aside just yet—let’s turn it into a stylish tote bag that not only breathes new life into old fabric but also adds a unique touch to your accessory collection.
Materials Needed:
- Oversized graphic T-shirt
- Scissors
- Sewing machine or needle and thread
- Fabric marker or chalk
- Ruler
Step 1: Select an Oversized Graphic T-shirt: Choose a T-shirt with a captivating graphic or design that you no longer wear but can’t bear to part with. The more oversized, the better, as it provides more fabric for your tote.
Step 2: Cut off the Sleeves and Neckline: Lay the T-shirt flat on a surface, and using a sharp pair of scissors, carefully cut off both sleeves and the neckline. This step transforms your T-shirt into a rectangular shape, setting the stage for the tote bag’s creation.
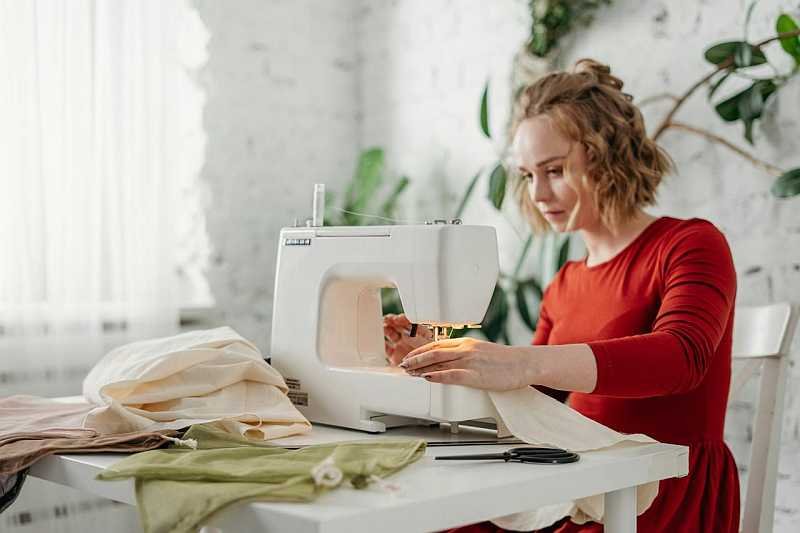
Step 3: Turn the T-shirt Inside Out and Sew the Bottom Hem: Flip the T-shirt inside out, exposing the inner side of the fabric. Align the bottom edges and sew across the hem using a sewing machine or hand stitching. This creates a closed bottom for your tote bag, ensuring that it can carry your belongings securely.
Step 4: Cut Strips along the Top Edge: With the T-shirt still inside out, use a fabric marker or chalk to mark evenly spaced intervals along the top edge of the fabric. These marks will guide the next step of creating handles for your tote.
Step 5: Tie Strips Together to Create Handles: Cut along the marked intervals, creating strips along the top edge of the T-shirt. Once the strips are cut, tie them together in pairs, forming sturdy handles for your tote bag. Adjust the tightness of the knots according to your preference.
Step 6: Flip the Bag Right Side Out: Now comes the exciting moment—flip your T-shirt tote bag right side out. The graphic that once adorned your T-shirt is now on the exterior of your trendy new accessory. Check that the knots are secure and the handles are well-tied.
Step 7: Voila! A Trendy Tote Bag from an Old T-shirt: Behold your transformed creation! Your once-forgotten T-shirt is now a fashionable tote bag, ready to accompany you on shopping trips, beach outings, or any adventure you embark on. The best part? It’s a unique piece that reflects your style and commitment to sustainability.
So, there you have it—a step-by-step guide to upcycling an old T-shirt into a chic tote bag. Get creative with your fabric choices and experiment with different T-shirts to build a collection of personalized, eco-friendly accessories.
Embellished Sneakers: Step-by-Step Guide to Sparkling Footwear
Are your plain sneakers craving a touch of glamour? Transform them into dazzling statement pieces with this easy DIY embellishment project. Grab a pair of plain sneakers, some gemstones, fabric glue, and tweezers, and let’s get started!
Materials Needed:
- Plain sneakers
- Gemstones in various shapes and sizes
- Fabric glue
- Tweezers

Step 1: Choose Your Canvas Begin by selecting a pair of plain sneakers as the canvas for your sparkling creation. White or neutral-colored sneakers work well, providing a clean base for the gemstones to pop.
Step 2: Plan Your Design Before diving into the gluing process, take a moment to plan your design. Consider creating patterns, geometric shapes, or even covering the entire shoe for an all-over dazzling effect. Lay out the gemstones on the sneakers to visualize the design and make any adjustments as needed.
Step 3: Get Your Tools Ready Prepare your workspace by having all the necessary tools within reach. Place the gemstones, fabric glue, and tweezers on a clean, flat surface. This will make the application process smoother and more precise.
Step 4: Apply Fabric Glue Using your tweezers, carefully pick up a gemstone, apply a small amount of fabric glue to the back, and place it on the predetermined spot on the sneaker. Be mindful of spacing and arrangement to achieve your desired design. Continue this process until all gemstones are in place.
Step 5: Handle with Care Precision is key in this project, so handle the gemstones and sneakers with care. The tweezers allow for accurate placement, ensuring each gemstone is exactly where you want it. Take your time to create a polished and professional-looking design.
Step 6: Allow Glue to Dry Completely After placing all the gemstones, allow the fabric glue to dry completely before wearing your revamped sneakers. Drying times may vary, so refer to the glue’s instructions for the best results. Avoid rushing this step to ensure a secure and long-lasting bond between the gemstones and the sneakers.
Step 7: Flaunt Your Dazzling Kicks Once the fabric glue is fully dry, your embellished sneakers are ready to hit the streets! Strut your stuff with pride, knowing that your unique and sparkling footwear is a result of your creativity and flair.
Tips:
- Experiment with different gemstone shapes, colors, and sizes for a dynamic and eye-catching design.
- Consider creating a matching pair or a mismatched, eclectic look for added personality.
- Use fabric glue specifically designed for adhering embellishments to ensure a strong and durable bond.
Now you’re ready to step out in style with your one-of-a-kind, embellished sneakers. Show off your fashion-forward footwear and let your creativity shine!
Crafting Elegance: Transforming Forgotten Jewelry into a Statement Necklace
Unearth the hidden treasures in your jewelry collection as we embark on a creative journey to breathe new life into forgotten pieces. With just a few materials and a touch of ingenuity, you can turn neglected necklaces and chains into a dazzling statement necklace that reflects your unique style.
Materials Needed:
- Old necklaces and chains
- Jump rings
- Jewelry pliers

Step 1: Raid Your Jewelry Box for Inspiration: Delve into your jewelry box, discovering old necklaces and chains with various textures, colors, and lengths. Each piece holds the potential for a stunning transformation.
Step 2: Detangle and Separate with Care: Exercise patience as you carefully detangle and separate each individual piece. This step is crucial in revealing the hidden beauty within each strand, setting the stage for your creative process.
Step 3: Arrange for a New Design: Lay out the detangled pieces on a flat surface and let your creativity flow. Experiment with different arrangements to create a design that resonates with your personal style. Mix and match colors, layer lengths, and embrace asymmetry for a truly unique composition.
Step 4: Use Jump Rings to Connect: Employ small, sturdy jump rings to connect the various elements of your necklace. With the precision of jewelry pliers, open and close the jump rings, ensuring a secure and polished connection.
Step 5: Enjoy Your One-of-a-Kind Creation: Marvel at the transformation of forgotten jewelry into a bold and one-of-a-kind statement necklace. Wear your creation with pride, knowing it is a unique expression of your creativity and resourcefulness.
In just a few simple steps, you’ve rescued old jewelry from obscurity, giving it a new purpose and transforming it into a fashion-forward accessory. Your statement necklace not only speaks volumes about your style but also serves as a testament to the beauty that emerges from repurposing and upcycling.
So, the next time you contemplate discarding old jewelry, reconsider—the potential for a dazzling transformation might be waiting to happen. Embrace the art of repurposing, and let your creativity shine through your uniquely crafted statement pieces.
Distressed Jeans: A Step-by-Step Guide to Achieve the Perfect Worn-In Look
Materials Needed:
- Old pair of jeans
- Marking tool (chalk or pencil)
- Scissors or X-Acto knife
- Tweezers
- Washing machine and dryer

Step 1: Choose the Right Pair of Jeans Begin by selecting a pair of old jeans that you want to transform. The distressed look works well with denim that has seen some wear but is still in good condition.
Step 2: Mark Areas for Distressing Using a marking tool, such as chalk or a pencil, identify the areas you want to distress. Common areas include the knees, thighs, and pockets, but feel free to get creative and mark spots that resonate with your personal style.
Step 3: Distress the Marked Areas Once you’ve marked the areas, it’s time to distress the jeans. You can use either scissors or an X-Acto knife for this step. Carefully cut horizontal slits, varying in length and width, in the marked areas. Don’t be afraid to experiment with different distressing patterns to achieve a unique and personalized look.
Step 4: Create a Frayed Look After making the cuts, use tweezers to pull at the vertical threads in and around the distressed areas. This process will create a frayed and textured look, giving your jeans that effortlessly worn-in appearance. The more threads you pull, the more pronounced the distressed effect will be.
Step 5: Wash and Dry for the Final Touch To enhance the distressed effect and soften the denim, toss your jeans into the washing machine. Use a regular cycle with cold water and add a small amount of detergent. Once washed, transfer the jeans to the dryer and let them tumble dry on a low to medium heat setting.
The washing and drying process will further loosen the fibers and emphasize the distressed areas, providing that perfect lived-in vibe. Keep in mind that the more you wash and wear your distressed jeans, the better they’ll look over time.
Step 6: Your Bold Fashion Statement Once your jeans are out of the dryer, they’re ready to make a bold fashion statement. Pair them with a casual tee and sneakers for a laid-back look, or dress them up with heels and a stylish blouse for a more polished appearance. The beauty of distressed jeans lies in their versatility and ability to add an edgy element to any outfit.
Congratulations! You’ve successfully transformed a pair of old jeans into a trendy and customized fashion piece. Enjoy rocking your revamped distressed jeans with confidence and flair.
Conclusion
There you have it—five fabulous DIY fashion projects to elevate your style game. Embrace your creativity, experiment with textures, and infuse your personality into every piece. The best part?
You’ll not only stand out with your unique creations but also contribute to a more sustainable and eco-friendly fashion future. So, gather your supplies, put on your crafting hat, and let the DIY fashion fun begin! Share your masterpieces with us — we can’t wait to see your incredible transformations. Happy crafting!